There are a number of special considerations when printing graphs from the Editor.
Printing from a graph
For the sake of convenience, there is a Print command on the menu of each graph window, which displays the standard Print dialog and automatically selects the Current Graph option.
Printing a graph shown as a table
There is also a Print button available if you show a graph as a table, which also displays the standard Print dialog, and automatically selects the Current Graph option. Whenever a graph is displayed on the screen as a table, the Editor will print a table instead of a graph. If you choose the Visible Graphs option, you will get print-outs of all graphs and tables displayed on the screen.
Note: This behaviour is slightly different from the STEM Results program, where separate graph and table printing options are provided, as only one graph can be shown as a table at any one time.
Printing several graphs on one page
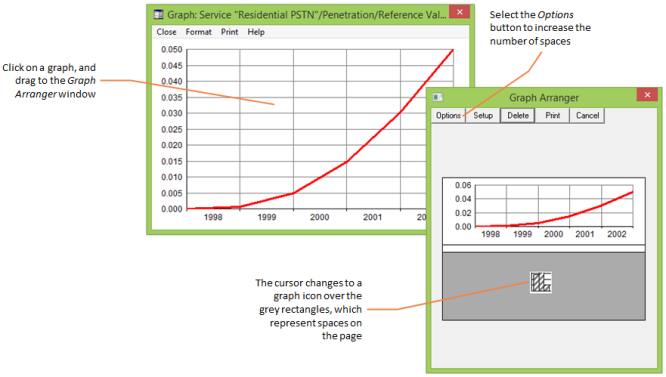
If you want to combine several graphs on one page:
- Select Arrange Graphs… from the choice of what to print in the Print dialog. The Graph Arranger window is displayed.
- Left-click on the centre of a graph and drag to the Graph Arranger window. The cursor changes from a cross to a graph icon over the grey rectangles, which represent spaces on the page. Release the mouse button to copy the graph into the first space. Repeat to copy another graph into the second space.
- Select the Options button if you want to increase the number of spaces available.
- Select Print to return to the Print dialog – note that the choice has changed to Arranged Graphs.
- Click OK to send your arrangement to the printer.
Dragging a graph onto the Graph Arranger window