In order to store the current set of graphs and tables for future recall:
- Select Fix As… from the View menu. The Fix As View dialog is displayed.
-
Enter a short description of the view – or select an existing name from the drop-down in order to replace or update an existing view – and press <Enter>.
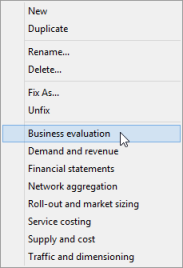 The newly named view is added to the set of defined views, which is listed at the bottom of the View menu (in alphabetical order).
Accessing an individual results view
Selecting one of the named items at the bottom of the View menu closes all current graphs and tables and restores the previously saved layout.
Note: You can overlay one view on top of another by holding <Shift> while selecting the name of the second view from the View menu, e.g. if you want to use a progressive reveal during a presentation.
Stepping through a sequence of Views
For presentational purposes, it will generally be inconvenient to have to return to the View menu in order to access each view in turn, and so you can also press <Page Down> or <Page Up> in order to step through the successive views in sequence.
Note: Press <Shift+Page Down> to overlay a second view.