stem.xla is an Excel add-in, shipped with STEM, which allows you to run models and access results directly from Excel. The add-in provides the facility to retrieve STEM results through clear and intuitive worksheet formulae. It also contains macros for running STEM models from Excel. Both aspects of its operation can be controlled from a handy custom toolbar.
A brief description of this add-in is given in the following pages, and it must be emphasised that no specialist knowledge is required to use these functions with one of your models. If you wish to customise these functions, the underlying code should be readily adaptable if you are familiar with Visual Basic, but a description of the internal code structure is beyond the scope of this documentation.
Loading the STEM add-in
In order to load the add-in (in Excel 2007–2010):
- Select Options from the File tab. The Excel Options dialog is displayed.
- Select Add-Ins to show the options for viewing and managing Microsoft Office Add-ins (sic).
- In the Manage box at the bottom, select Excel Add-ins (sic) and click Go…
-
The Add-Ins dialog is displayed. Click on the Browse button. A file selection dialog is displayed.
-
Select a file called stem.xla
from the directory where STEM is installed and click OK. You are asked to confirm that you wish to copy stem.xla to your Add-Ins folder. Click Yes. The STEM Add-In is added to the list of installed add-ins, complete with a brief description of its functionality.
- Click OK.
- Select the Add-Ins tab of the Excel ribbon so that the toolbar is visible.
Note: depending on your company templates, it may be necessary to change the Excel macro security setting for a new workbook to allow access to its internal ‘VB project module’ to enable the STEM add-in to work properly. You can access the relevant settings in Excel via the Excel File/Options dialog. In the Trust Center category, click Trust Center Settings…, and then click the Macro Settings category. You need to tick ‘Trust access to the VBA project object model’.
In order to load the add-in (in Excel 1997–2005):
- Select Add-Ins from the Tools menu. The Add-In Manager is displayed.
- Follow steps 4–6 above.
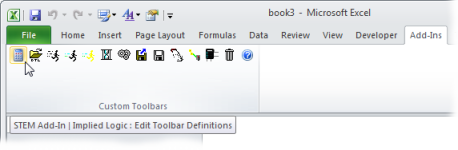
When you first load the add-in in Excel 1997–2005, a custom toolbar should appear, with the caption STEM Add-In. (If not, it should be available via the Toolbars sub-menu on the Excel View menu.) In fact, the toolbar you see is a copy of the one in the add-in. It will still be available next time you start Excel, and clicking any of the buttons will automatically re-open the add-in file.

Figure 1: The STEM add-in custom toolbar
One of the buttons actually closes the add-in, although the toolbar itself remains visible. Like other Excel toolbars, it can be dragged to one side of the screen and ‘docked’; or closed, and subsequently recalled from the Toolbars sub-menu on the Excel View menu. The Customise command on this sub-menu enables you to add the add-in’s buttons to custom toolbars of your own, or to delete the toolbar altogether so that it is no longer available.
Note: it is necessary to delete a previous STEM add-in toolbar in order to access the extended toolbar supplied with STEM 7.3. To do this in earlier versions of Excel, choose the Toolbars sub-menu on the Excel View menu and use the Customise command on this sub-menu. In Excel 2007–2010 you can just right-click the old toolbar and select Delete Custom Toolbar from the popup menu.

|
Edit toolbar definitions
|

|
Load results
|

|
Browse to STEM model
|

|
Unload results
|

|
Run the working model
|

|
Paste scenarios
|

|
Run scenarios
|

|
Paste elements
|

|
Run All (run working model and scenarios)
|

|
Paste results
|

|
Update results
|

|
Close add-in
|

|
Load configuration
|

|
Help button
|
Figure 2: Functionality of buttons on the STEM add-in toolbar
Configuring the STEM Add-In custom toolbar
The add-in toolbar provides commands to run a given STEM model, or its scenarios, and access its results. Most of these commands require that the STEM installation directory, model name, selected scenarios and so on are identified through a series of named ranges. The Edit toolbar definitions button helps you to configure these names.
It pastes in the following toolbar definitions sheet (or locates it if you have already created it):
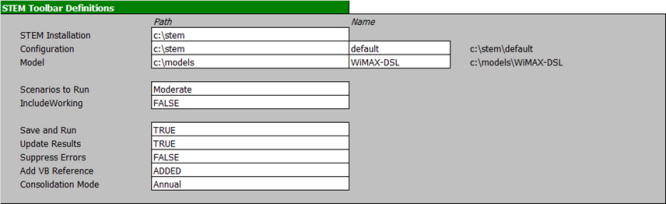
Figure 3: STEM add-in toolbar definitions sheet
You may leave the first three Path cells blank to indicate that the add-in should locate the files in the same folder as the workbook, or locate the STEM software automatically (according to the STEM model file association in the Windows registry).
The remaining cells govern auxiliary actions when running a model or its scenarios.
|
Cell
|
Governs
|
|
Scenarios to Run
|
Which scenarios should be run by the Run Scenarios button, which can be specified using the same identifiers as required by the
StemGetResult() function, and which can be established using the Paste Scenarios button.
e.g., “Variant 1/Variant 3”; “Variant 1/Variant 4”
|
|
Include Working
|
Whether the working model is also run by the Run Scenarios or Run All buttons
|
|
Save and Run
|
Whether the active workbook should be saved before running a model or its scenarios, which is convenient if your model links inputs from that workbook
|
|
Update Results
|
Whether results worksheet formulae should be updated after running a model or its scenarios
|
|
Suppress Errors
|
When this is set to FALSE
(the default), the STEM add-in reports errors such as ‘Element not found’ within the return value from the
StemGetResult()
function as usual. However, if it is set to TRUE, then the
StemGetResult()
function returns an array of empty variants (instead of an error message) from which Excel will set a zero value into each affected cell
|
|
Add VB Reference
|
Whether the add-in needs to fix-up the so-called VB reference with
STEM.XLA in the current workbook so that the worksheet formulae will work correctly. If it says
ADDED, this has already been done. You can set it to TRUE and then click the Edit Toolbar Definitions button to get it to reinstate the reference, or set it to FALSE to indicate not to bother (for whatever reason)
|
|
Consolidation Mode
|
Whether the StemGetResult() function should return consolidated values, either Annual, Quarterly or Monthly
|
Note: The worksheet containing this template does not have to be visible – i.e., the active worksheet – when you use the corresponding toolbar commands.
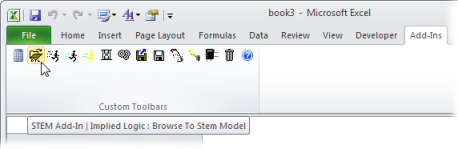
A handy Browse To Stem Model button on the toolbar allows you to browse to the location of your STEM model using a standard Windows file-selection dialog.
Accessing results directly
The STEM add-in provides the facility to retrieve STEM results through clear and intuitive worksheet formulae. These are most readily created and exhibited using the Export Results to Excel command in the Results Program. If model results are available, it will match the number of columns to the model run period.
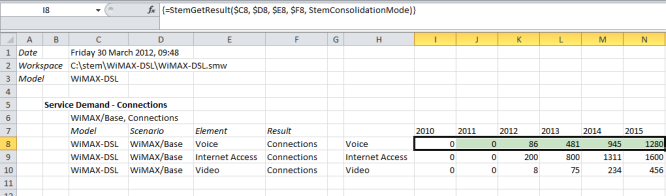
Figure 4: Sample worksheet formulae
Running a model from Excel
If the model results are not up to date, then the text ‘Failed to load results’ will be returned. If this is the case:
-
Click the
 button on the add-in toolbar to run the working model. If the cell Update Results =
TRUE, the results formulae should update automatically.
button on the add-in toolbar to run the working model. If the cell Update Results =
TRUE, the results formulae should update automatically.
-
Otherwise, click the
 button to update the results. The text should now be replaced by the desired results.
Monitoring the STEM results library interface
A status window for the stemres.dll interface, entitled ‘STEM Results Library’, should appear when you first open or update a sheet expanded from the Results program. This window indicates which results are loaded.
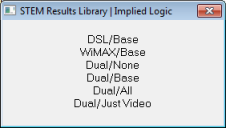
Figure 5: STEM Results Library status
You can click the  button to close this window at any time, which will first unload the given results and then close the
stemres.dll interface.
button to close this window at any time, which will first unload the given results and then close the
stemres.dll interface.
Using the STEM add-in on another computer
If you create an Excel interface which uses the STEM add-in, then, in order for someone to use a copy of the model on another computer, they must first load the add-in as described in Loading the STEM add-in above.
We strongly recommend that you work with the workbook in the same folder as the STEM model so that you can leave the model and configuration paths blank in the add-in toolbar definitions sheet. This avoids the need to alter these cells if the workbook/model package is copied to another machine. The add-in will locate the run-time software components automatically if they are located in the same folder as the workbook.
If the installation path chosen by the end-user for the stem.xla add-in differs from that on the computer where the original spreadsheet interface was saved, then this will not matter if the workbook was created with the STEM 7.3 add-in. If the end-user first opens stem.xla, then the workbook will automatically adjust to use the add-in in its new location. Otherwise Excel will prompt the end-user to browse for the new add-in location:
-
Select Edit Links from the Data tab in Excel 2007–2010 (or Links… from the Edit menu in Excel 1997–2005). The Links dialog is displayed, showing a list of external files referenced by the spreadsheet, including
stem.xla.
-
Select the reference to stem.xla and then click the Change Source button. A file selection dialog is displayed.
-
Browse to the appropriate installation path, select stem.xla and then click OK. All references to stem.xla are resolved to the new path.
Note: This process may generate some spurious warnings from Excel, e.g., “Microsoft Excel cannot find StemGetResultsStatus”, but these can safely be ignored.
Un-installing STEM
To remove the STEM software from your system, simply delete all the files from the directory into which you originally copied the model and run-time software. You will also need to delete any shortcuts which you added to your Windows Start menu.