When you first create a STEM model, a standard set of icons is associated with the elements, and a standard set of colours is used for the links between them and for the colour blocks around groups of elements. These standard settings have been used for the illustrations throughout this training guide to avoid confusion. Now we will try changing them!
Please revert to the original WiMAX-DSL02 model.
 Save the model as WiMAX-DSL51
- Select Change Icon… from the icon menu for the Homes element. The Choose Icon dialog is displayed.
- Click the Browse button, navigate to the folder where STEM is installed, select STEMICON.DLL, and then click Open. The Choose Icon dialog displays the first seven icons of around 270 icons in the pre-supplied file.
- Scroll to near the end, approximately four pages back, where you will find an icon showing a house with a car parked outside.
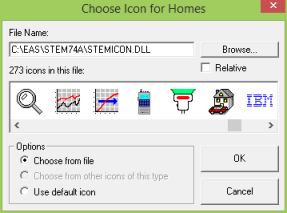
- Select this icon and click OK. The icon of the element is changed.
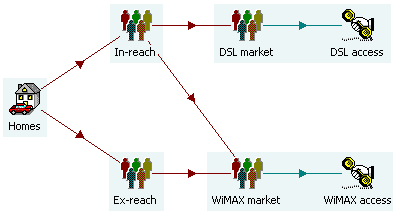
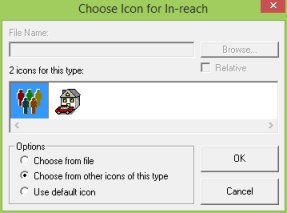
- Repeat this process for the In-reach element. As well as choosing from external files, you can quickly choose from icons already in use for other elements of the same type in the current view.
If you plan to share this model with other colleagues, it is a good idea to copy STEMICON.DLL or any other icon files into the model folder, and then check the Relative path box in the Choose Icon dialog when you are changing an icon.
- Select Colour Block… from the icon menu for the Technology element. The Colour Block Style dialog is displayed.
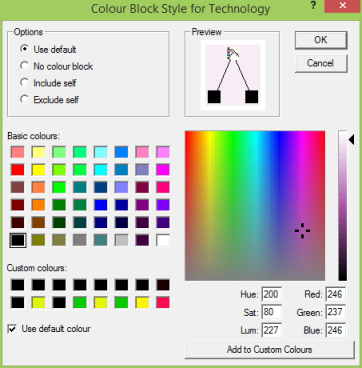
- Try changing the colour (which is useful for differentiating multiple collections) and decreasing the luminosity (which can help on some screens to increase the contrast against a white background).
- Experiment with the No colour block, Include self and Exclude self options.
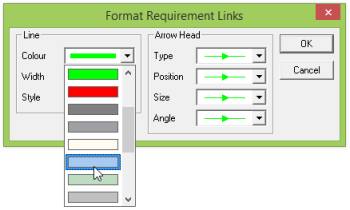
- Right-click the requirement link between the DSL access service and the DSL shelf resource, and then select Format… from the popup menu. The Format Links dialog is displayed, so-called because these settings apply to all links of the given type in the current view.
- Experiment with different colours, widths, line and arrow styles.
As well as the Format Links dialog applying to all links of a given type in the view, you may have noticed options to use the default icon for a view, or default colour block style or colour. These defaults are defined on a per-view basis as follows.
-
Select Display Options… from the main Element menu. The Display Options dialog is displayed.
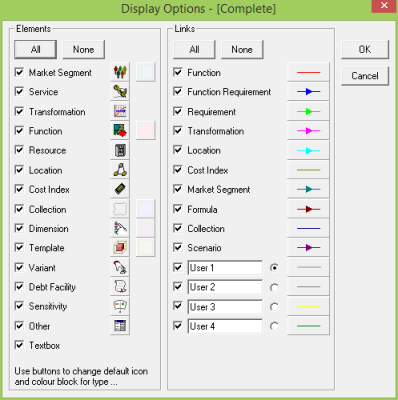
The checkboxes can be used as filters for individual icon or link types. The All/None buttons select or de-select all the checkboxes in one column.
- Click the
 button to change the default icon for market segments. You can choose from any of the icons you have chosen in this view, as well as the system default icon, and this change will apply to all market segment elements in this view which have not been given a separate icon.
- Click one of the plain shaded buttons to change the default colour-block style for all the elements of the given type in the current view.
- Click the Requirement button to change the link style for all requirement links in the current view. (This goes to the same Format Links dialog as you get from the link menu, as we explored earlier.)
The link from the Technology dimension to the DSL market and WiMAX market elements is an example of a user link, created with the  button on the toolbar.
- Click the radio button alongside one of the other User link styles.
- Click the button and then click and drag between two existing icons to create a new link of the indicated style.
- Click the button again to create another link of the same type.

These settings are inherited from the current view if you use the Duplicate command from the View menu or the Show In A New View… command from an icon menu, but not if you select New from the View menu.
If you really want to confuse your colleagues, you can change the system defaults, at least for the icons, by modifying STEM.INI. This procedure is beyond the scope of this training course, but is described in 11.4 STEM.INI.
 Things that you should have seen and understood
Icon, link, colour block, view defaults, system defaults
Change Icon, Format Link, Colour Block Style, Display Options