In order to configure the automatic upload correctly, you need to access the Upload Settings dialog by pressing the Upload Settings button in the Create Web Interface dialog. (or it will prompt automatically the first time you attempt an upload at step 6 in 8.2.7.1 General procedure).
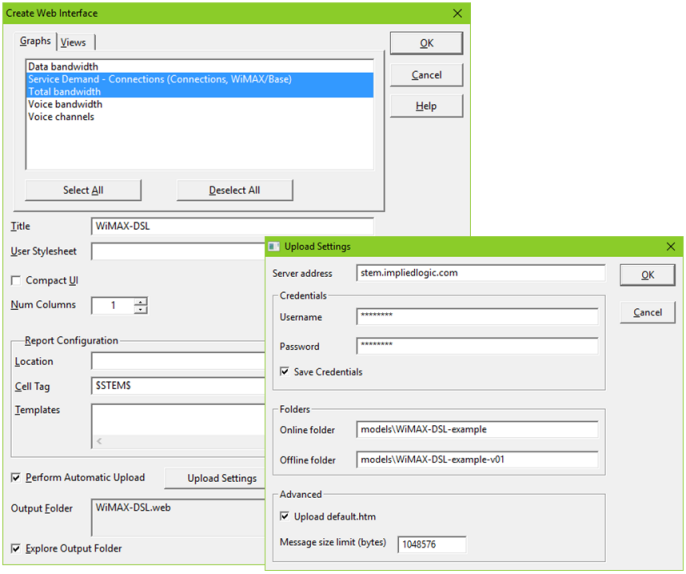
Entering the correct upload settings for direct upload to server
In this dialog you can enter the server address, and credentials for access (Username and Password) if required; there is also the option to Save Credentials for future uploads. You must also specify the online and offline folders on the server to which the respective components should be uploaded or delivered. In the Advanced section of the dialog, you can choose whether to upload the default.htm file. This depends on whether the model is a self-contained web page or intended to fit into a separate content management system. Finally, you can set a Message size limit, such that the upload will fit into whatever limits you have defined on the server.
Once you have defined the upload settings initially, the same settings will be applied for subsequent uploads. Not only will this save time and reduce the likelihood of introducing errors with multiple revisions, it will also make it easier to make the results ‘just so’ without the previous concern about a manual slip at the last turn.