In the previous part of the tutorial, we saw that charging a rental tariff of EUR 5.0/customer/month resulted in a breakeven point of 9 years. We could keep changing the tariff to find out what we would need to charge to break even in 2, 3 or 5 years. However, a more elegant solution is to create a set of parallel scenarios in STEM that can keep and maintain the answers separately, and present them in a single graph.
- Return to the Editor and go to the Tariffs dialog.
- Ensure that the Rental Tariff field is selected and then go to the Variants menu in the dialog and select Add as Scenario Parameter.
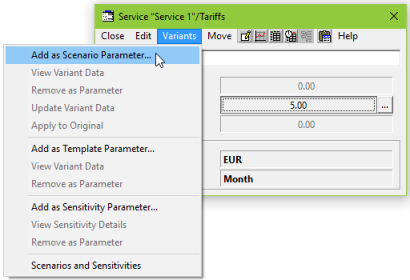
Figure 1: Creating scenarios in the model
- STEM creates four new elements (Dimension 1, and Variants 1, 2 and 3) and opens a Variant Data table for Dimension 1.
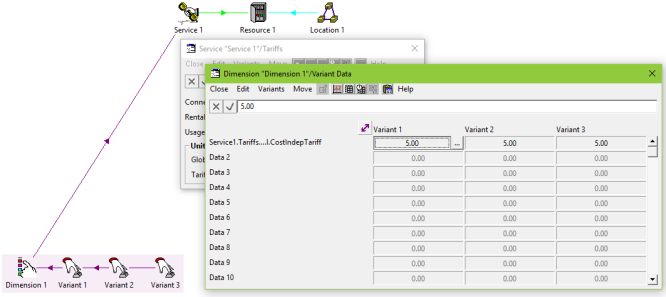
Figure 2: Creating scenarios for the Rental Tariff
- You will notice that the original Rental Tariff field is now shaded pink, indicating that there are additional parameters associated with this value.
- Right-click on Dimension 1 and select Parameters to open the Parameters dialog, where you can see that the rental tariff for Service 1 is listed.
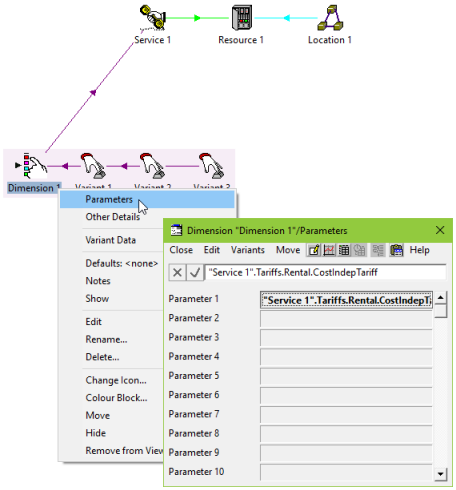
Figure 3: Parameters dialog for Dimension 1
- Now look at the Variant Data table. Each variant initially has the working model value of EUR 5.0 for rental tariff. We will enter different rental tariff values and ask STEM to run the model with these different assumptions in parallel to the working model to see how this affects the results.
- Enter values of 8, 10 and 12 for the Rental Tariff for Variants 1, 2 and 3, respectively.
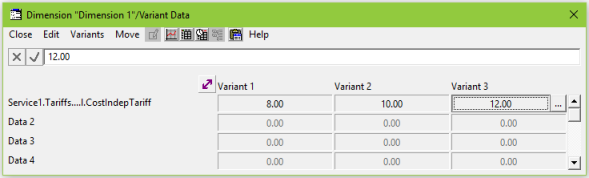
Figure 4: Entering scenario parameters for the Rental Tariff
- If you press <F5> to run the model, STEM will run the working model only and not the scenarios.
- To run the scenarios too, go to the File menu and select Scenarios and Sensitivities. The Scenarios and Sensitivities dialog will open.
- The asterisks denote which scenarios have been changed and have not yet been run. Check the Include Working Model checkbox to run the working model too, and then press the All button to run all the scenarios as well.
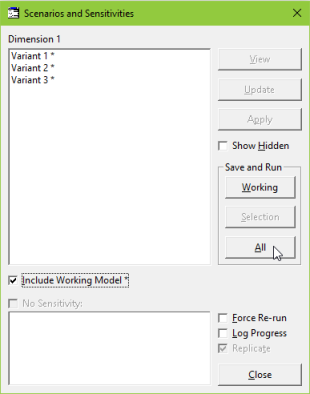
Figure 5: The Scenarios and Sensitivities diaolog
We will examine the results in the final part of this tutorial.
Note: in this simple case it may be helpful to rename Dimension 1 as Scenarios, and the variants as something like Low, Medium and High. As a model grows, you can add further correlated inputs to the same dimension element, and create additional dimensions to vary other assumptions independently, in order to explore a multi-dimensional scenario space.
 Things that you should have seen and understood
Scenarios, Dimension, Variants
Variants menu, Add as Scenario Parameter
Variant Data, Parameters dialog
Scenarios and Sensitivities dialog, Running scenarios