There are several ways to create a model element in STEM.
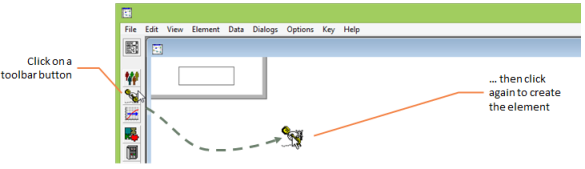
The most effective way to create a new element is to use the toolbar, which has a ‘click and click again’ operation. If you want to add a new element to a model:
-
Click on the button for the element you want to create. The cursor changes to include an icon for that element.
- Move the icon to the desired position and click for a second time.
To cancel this operation, press <Esc>.
The table below describes all the methods available in STEM to create an element.
| Method |
Position of icon |
| Click the toolbar, and then click again |
Mouse cursor, subject to snap-to-grid |
| Select Create from the Element menu |
Mouse cursor, subject to snap-to-grid |
| Click the toolbar while pressing the <Shift> key |
First available slot (along and up) from the bottom left |
| Use a keyboard accelerator, such as <Ctr+Shift+S> to create a service element, or <Ctr+Shift+R> to create a resource element |
First available slot (along and up) from the bottom left: useful if you want to create several elements at once |
Figure 1: How to create an element in STEM
An icon can be moved to a more satisfactory position by dragging it with the mouse.
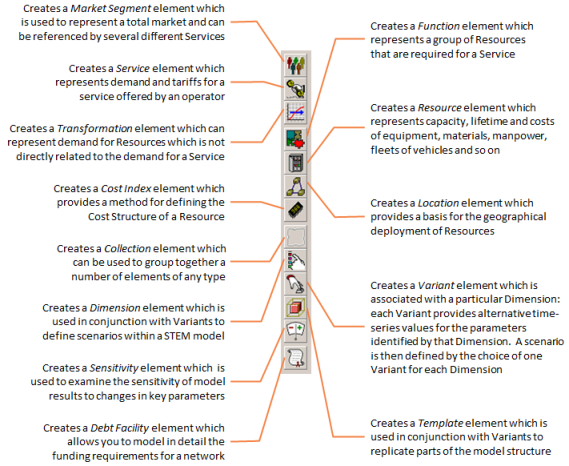
Figure 2: The element creation toolbar
By default, the Editor assigns an automatic name, such as Market Segment 1. This can be changed by unchecking the
Automatic Names command on the Options menu.